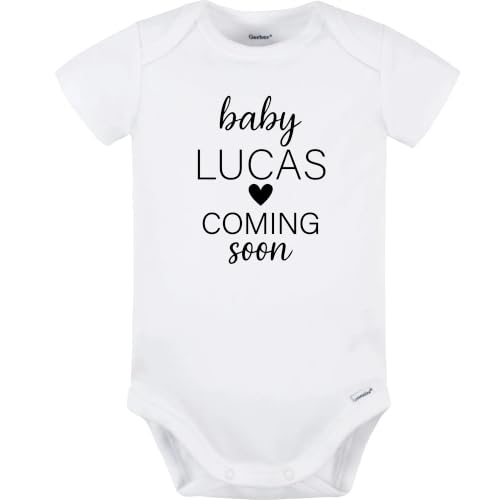
Customized Onesie Pregnancy Announcement: The Complete Guide
Discover how to design, create, and photograph a personalized onesie pregnancy announcement that family and friends will remember. From printing methods to creative reveal ideas, this guide covers everything expecting parents need before ordering.
Why a custom onesie works so well: A customized onesie pregnancy announcement turns a simple baby bodysuit into a storytelling prop. It communicates the news instantly in photos, works across social media and printed cards, and doubles as a keepsake after the baby arrives. Parents who are researching this topic usually already know they want a personalized reveal — what they need is clarity on design choices, printing techniques, sizing, and how to avoid common mistakes.
This guide walks through each decision in order so you can move from idea to finished announcement with confidence. Along the way, you will find practical comparisons and pointers to related nursery and gear guides on CradleCheck.
What Makes a Good Customized Onesie Pregnancy Announcement
A strong announcement onesie balances three elements: a clear message, a readable design, and a garment that photographs well. Because the onesie is usually held up or laid beside an ultrasound photo, contrast and legibility matter more than intricate detail. Bold lettering, simple icons, and a clean background tend to outperform complex artwork in real-world photos.
The message itself can range from a direct "Coming Soon" to a playful sibling-themed line such as "Promoted to Big Sister." Many parents pair the onesie with a matching custom pregnancy announcement onesie concept or a coordinated family outfit set. If you plan a joint reveal, the guide on dad and newborn son matching outfits offers ideas for coordinating adult and infant clothing in the same photo.
Consider how the onesie will be used. A flat-lay photo on a blanket calls for a design that reads well from above. A photo where the onesie is held by a parent favors a centered chest print. Social media square crops reward centered, vertically compact designs, while printed announcement cards may allow a wider layout.
Editorial tip: Choose one focal message per onesie. Trying to fit a name, a date, a sonogram image, and a slogan onto a single newborn-size garment usually produces a cluttered result that is hard to read in photos.
Design Ideas for Your Announcement Onesie
The design direction you choose shapes every later decision, from printing method to garment color. The following categories cover the most common approaches and what each one does well.
Text-Only Designs
Simple typographic onesies are the most versatile option. Popular phrasings include "Baby Loading," "Hello World," "Arriving Soon," and "Worth the Wait." Text-only designs are easy to produce with vinyl heat transfer, which makes them a favorite for DIY announcements. Keep the font thick enough to remain legible at small scale, and limit the design to two lines on a newborn-size bodysuit.
Sibling and Family Reveals
If an older child will help deliver the news, a onesie that says "Big Sister" or "Big Brother" creates an instant narrative. These designs pair naturally with family photos and with themed sibling outfits. For broader reveal inspiration beyond the onesie itself, the collection of creative ways to announce pregnancy to family includes photo setups that work well with a custom bodysuit as the centerpiece.
Holiday and Seasonal Themes
Seasonal announcements use the onesie as a calendar cue — a pumpkin motif for an autumn reveal, a snowflake for winter, or a beach graphic for summer. These designs benefit from full-color printing because gradients and illustrations reproduce better with direct-to-garment than with single-color vinyl.
Minimalist and Modern Designs
Minimalist announcements rely on small chest logos, single-word statements, or abstract line art. They photograph beautifully against neutral nursery backdrops and pair well with the aesthetic covered in the custom wooden name signs for nursery guide. If you are building a coordinated reveal set, this style is the easiest to extend into nursery decor later.
Partner-Focused Reveals
Some parents use the onesie to surprise their partner first. A onesie tucked into a drawer or gift box works as a quiet, personal reveal before the wider family announcement. The article on creative ways to tell your husband you're pregnant covers timing and presentation ideas that pair naturally with a custom bodysuit.
Printing Methods Compared
The printing method determines how detailed your design can be, how it feels against a newborn's skin, and how well it survives washing. The table below compares the main options by tier and best use case, without reference to specific figures.
| Method | Tier | Best For | Durability | Design Complexity |
|---|---|---|---|---|
| Direct-to-Garment (DTG) | Premium | Full-color illustrations, photo-style art, gradients | Good with proper care | High |
| Vinyl Heat Transfer | Mid-range | Bold text, simple icons, DIY projects | Very good for solid shapes | Low to moderate |
| Screen Printing | Mid-tier to premium | Large batches, team or family sets | Excellent | Moderate (one color per screen) |
| Embroidery | High-end tier | Names, monograms, textured premium finish | Excellent | Low (stitch-based) |
| Printable Transfer Paper | Entry-level | One-off home projects, quick prototypes | Moderate | Moderate |
| Fabric Markers | Starter tier | Hand-drawn, personal, craft-style reveals | Depends on fixative | Low |
For most one-off announcement projects, DTG and vinyl heat transfer cover the widest range of needs. DTG handles detailed artwork, while vinyl is efficient for bold lettering and is the most common DIY path. Screen printing becomes worthwhile when several family members want matching garments. Embroidery is a solid choice when the design is a name or short phrase and you want a tactile, high-end finish that will not crack.
Comfort note: Newborn skin is sensitive. If the onesie will be worn by the baby after birth, choose a print method with a soft hand feel and place large solid prints away from the chest area. Always wash the garment before first wear according to the printer's care instructions.
Choosing the Right Onesie Blank
The garment underneath the design matters as much as the artwork. Three factors drive the choice: fabric, closure style, and color.
Fabric
100% cotton is the standard for announcement onesies because it takes prints well, feels soft, and photographs with a matte finish. Cotton-polyester blends resist shrinking and hold vivid colors longer, which helps if the onesie will be displayed or reused. Organic cotton sits in the premium tier and appeals to parents who prioritize low-impact dyes and unbleached fabric.
Closure Style
Snap closures at the bottom are the classic choice. Side-snap or envelope-neck styles make dressing a newborn easier and are worth considering if the baby will wear the onesie in the first weeks. For flat-lay photos, the closure style is invisible, so choose based on post-announcement use.
Color and Contrast
White and cream bodysuits remain the most photographed options because they accept nearly any print color and photograph cleanly. Dark garments with light prints create high contrast for social media, but they show lint and can look heavy in soft nursery lighting. If the reveal photo will sit alongside nursery decor, coordinate with the palette you plan for the room — the nursery color palettes guide is a useful reference for building a cohesive set.
Sizing
Newborn size is the most common choice for announcement photos because it visually communicates "new baby." A 0-3 month size is a practical alternative if you want the baby to wear the onesie after birth for a follow-up photo. Ordering a size the baby will grow into is a reasonable strategy for keepsake use, but keep in mind that oversized garments drape loosely in photos.
DIY vs Professional Printing
The decision between making the onesie at home and ordering from a print service usually comes down to design complexity, timeline, and how many garments you need.
When DIY Makes Sense
- The design is simple text or a single icon.
- You need the onesie quickly for a spontaneous reveal.
- You want full creative control and enjoy the craft process.
- You are making one or two garments rather than a family set.
Heat transfer vinyl with a home iron is the most accessible DIY method. Printable transfer paper works for photographic designs but produces a stiffer feel and requires careful mirroring before printing. Fabric markers suit hand-lettered designs and personal messages, especially for a craft-style reveal.
When Professional Printing Makes Sense
- The design includes gradients, illustrations, or fine detail.
- You need a family set of matching garments in different sizes.
- You want a consistent, retail-quality finish for printed announcement cards.
- You prefer a proofing step before production.
Professional printers typically provide a digital proof so you can catch spacing or spelling issues before production. Allow two to four weeks for design approval, production, and shipping, and order a sample if the design is complex.
Creative Ways to Use the Onesie in Your Reveal
Once the onesie is ready, the reveal format determines how the garment appears in photos and video. The following ideas work with almost any design.
Flat-Lay Photo
Lay the onesie on a neutral blanket beside an ultrasound photo, a pair of baby shoes, and a sonogram printout. Overhead natural light produces the cleanest result. This format is the easiest to replicate and works well for social media.
Gift Box Reveal
Place the folded onesie inside a gift box with tissue paper and hand it to grandparents or your partner. The moment of opening creates a natural reaction shot. Pair it with a short handwritten note for a more personal touch.
Drawer or Closet Discovery
Slip the onesie into a drawer where your partner will find it during a normal daily routine. This low-key approach works especially well for partner-first reveals and pairs with the ideas in the guide on creative ways to tell your partner you're pregnant.
Family Photo Session
Include the onesie in a family portrait where an older sibling holds it up. This format creates a reusable image for announcement cards and social posts. Coordinate adult and sibling clothing in the same palette so the onesie remains the focal point.
Grandparent Reveal
Grandparents often respond best to a physical object they can hold. A framed onesie with a short message, or a onesie paired with a photo album page, works well. For additional presentation ideas, see the collection of cute ways to tell grandparents about pregnancy.
Video Reveal
Film a short sequence where the onesie is revealed at the end — pulled from a box, flipped over to show the text, or placed on a chair beside a positive test. Keep the onesie message hidden until the final frame for maximum impact.
Photography Tips for Announcement Onesies
The best onesie design can still underperform in photos if lighting and framing are off. A few practical adjustments make a visible difference.
- Use soft, indirect light. Direct sun washes out light-colored prints and creates harsh shadows on fabric texture.
- Iron or steam the onesie first. Creases distract from the design and read as clutter in flat-lay photos.
- Fill the frame with the design. Crop close enough that the message is legible on a phone screen without zooming.
- Add one supporting prop. An ultrasound photo, a pair of booties, or a wooden name sign provides context without competing with the onesie.
- Shoot both flat-lay and held-up versions. Flat-lays suit announcement cards; held-up shots work better for social video.
- Check color accuracy. Test your camera or phone against a white onesie before the final shot so print colors match reality.
If the announcement photo will appear beside nursery content, coordinate the backdrop with the room's eventual look. The nursery lighting guide explains how window direction and lamp placement affect fabric colors, which is useful if you plan to shoot the reveal inside the nursery itself.
Common Mistakes to Avoid
Most disappointing announcement onesies fail for predictable reasons. Avoiding these issues is simpler than fixing them after printing.
- Overcrowding the design. Too many elements on a newborn-size garment become unreadable in photos.
- Skipping the proof. Spelling errors and margin issues are easy to catch on a digital proof and costly to fix after printing.
- Ignoring print placement. Chest prints on tiny garments can sit too high or too low; check a placement guide or sample.
- Choosing a scratchy print for wear. If the baby will wear the onesie, prioritize soft-hand printing and wash before first use.
- Ordering too late. Custom printing needs lead time; order at least two to four weeks before the reveal date.
- Forgetting the keepsake plan. If you intend to frame or store the onesie, choose colors and materials that resist fading.
Planning Timeline
A short, realistic timeline prevents last-minute compromises. The schedule below assumes a professionally printed onesie; DIY projects can compress the front end but still need testing time.
- Four to six weeks before the reveal: Decide the message, design style, and garment color. Order a sample if the design is complex.
- Three to four weeks before: Finalize artwork and approve the digital proof. Confirm sizing and quantity.
- Two to three weeks before: Place the production order and confirm shipping details.
- One week before: Receive the onesie, inspect the print, and wash if the baby will wear it. Prepare props and plan the photo setup.
- Reveal day: Steam the garment, set up lighting, and capture both close-up and wide shots.
If the onesie is part of a broader registry or nursery preparation push, the registry timeline guide helps align the announcement with other planning milestones.
Caring for the Onesie and Preserving It as a Keepsake
Announcement onesies often become keepsakes, so care starts before the first wash. Turn the garment inside out, use cold water, and avoid fabric softener on printed areas. Skip the dryer for vinyl and transfer prints; air drying preserves the bond between print and fabric. For embroidery, wash inside out on a gentle cycle and avoid direct ironing over the stitching.
If you plan to frame the onesie, wash and dry it flat first, then mount it on acid-free backing. Keep the frame out of direct sunlight to slow fading. Many parents display the onesie in the nursery alongside a name sign or framed print; the guide on custom wooden name signs for nursery covers coordinating wall pieces that pair well with a framed announcement garment.
Frequently Asked Questions
What is a customized onesie pregnancy announcement?
It is a personalized baby bodysuit printed with a message, name, or design that reveals an impending birth. Parents use it in photos, gift boxes, and family reveal moments, and many keep it afterward as a memento.
Which onesie size should I order?
Newborn and 0-3 month sizes are the most common for photos. Newborn size communicates "new baby" visually, while 0-3 month allows the baby to wear the onesie after birth for a follow-up photo.
What printing method works best?
Direct-to-garment suits detailed, full-color artwork. Vinyl heat transfer is ideal for bold text and DIY projects. Screen printing works for matching family sets, and embroidery gives names and short phrases a premium, textured finish.
Can I make one at home?
Yes. Heat transfer vinyl with a home iron or heat press is the most accessible DIY method. Printable transfer paper and fabric markers are also viable for one-off designs, though durability varies by method.
How far in advance should I order?
Order two to four weeks before the reveal to allow for proofs, production, and shipping. Test any DIY method on a spare onesie before committing to the final garment.
Can the baby wear the onesie after the announcement?
Yes, if you choose a soft-hand print method and wash the garment before first wear. Vinyl prints on the chest can feel stiff on newborn skin, so consider placement and print type if post-announcement wear is a priority.
Final Thoughts
A customized onesie pregnancy announcement is one of the few baby purchases that serves three purposes at once: it delivers the news, it anchors your reveal photos, and it becomes a keepsake. The decisions that matter most are the message, the print method, and the timeline. Get those right, and the rest — props, backdrop, and framing — falls into place quickly.
As you move from announcement planning into nursery setup, the nursery layout guide and the convertible crib guide are natural next reads. Both help you translate the aesthetic of your reveal into a room the baby will actually use.