Bringing a newborn home is a whirlwind of joy, sleepless nights, and a steep learning curve. Among the many new responsibilities, keeping your baby's feeding equipment clean is paramount. A newborn's immune system is still developing, making them highly susceptible to germs and bacteria that can thrive in leftover milk residue. This guide will walk you through the essential steps and best practices for cleaning bottles for newborn safety, ensuring every feeding is a safe and healthy experience.
Why Proper Bottle Cleaning is Non-Negotiable
A baby's digestive system and immune system are not as robust as an adult's. Contaminated bottles can lead to gastrointestinal issues, diarrhea, and infections. Beyond the health risks, lingering milk fats can cause the bottle and nipple to become cloudy or develop a sour smell, which can even make your baby fussy during feeding. Establishing a rigorous cleaning routine from day one helps prevent these issues and establishes a healthy habit.
For new parents, understanding the difference between cleaning, sanitizing, and sterilizing is crucial. Cleaning removes visible residue, sanitizing reduces the number of germs on a surface, and sterilizing kills almost all bacteria. For a newborn under three months old, or for babies with health conditions, sterilization is highly recommended. As your baby grows and their immune system strengthens, a thorough daily cleaning and sanitizing routine is generally sufficient.
Your Essential Bottle Cleaning Toolkit
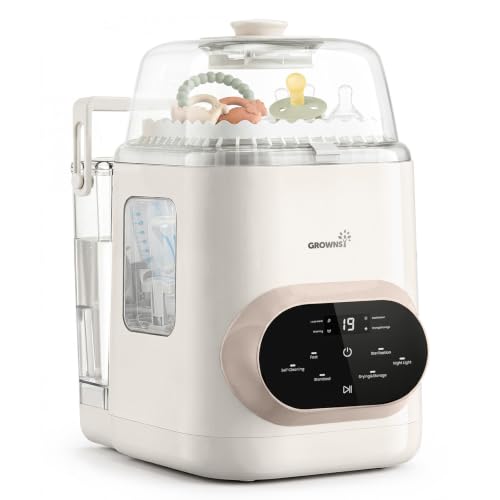
Having the right tools on hand makes the job easier and more effective. You don't need a lot of fancy gadgets, but a few key items are essential for proper cleaning. This includes a dedicated bottle washer and sterilizer for ultimate convenience, or a simpler setup for manual cleaning. Investing in the right tools ensures you can maintain the highest hygiene standards without it becoming a chore.
Here’s a list of what you’ll need:
- A dedicated bottle brush. This is a must-have to effectively scrub the inside of the bottle and the nipple.
- Nipple brushes. These tiny brushes are designed to clean the intricate crevices of the nipple, where milk can easily get trapped.
- Mild, fragrance-free dish soap. Avoid harsh detergents or soaps with strong scents, as the residue can be harmful to your baby.
- A large basin or washbowl. Dedicate this solely to washing baby bottles to prevent cross-contamination from other kitchen items.
- A drying rack. Allows bottles and nipples to air-dry completely, which is more hygienic than using a dish towel.
- A microwave or electric sterilizer. This is the most effective way to ensure all harmful bacteria are eliminated, especially during the first few months.
For parents on the go, a portable drying rack and a small bottle of soap can be a lifesaver. Remember, while a portable car seat for travel keeps your baby safe on the move, a portable cleaning kit ensures they are fed safely while out and about.
Step-by-Step Guide to Washing Baby Bottles
Following a consistent, thorough process is key. Here is the recommended step-by-step method for cleaning your baby's bottles.
1. Prepare Immediately After Use
The best way to make cleaning easy is to not let the milk dry. As soon as your baby finishes a bottle, rinse it with cold water. This prevents milk proteins from sticking to the glass or plastic and makes scrubbing much easier. Disassemble the bottle completely: separate the bottle, nipple, ring, and any other parts like anti-colic valves.
2. Soak in Warm, Soapy Water
Fill your dedicated basin with hot water and a squirt of mild dish soap. Submerge the disassembled bottle parts and let them soak for 5-10 minutes. This helps to loosen any stubborn milk film. For tougher residue, you can soak for longer, but don't leave it for hours, as the water can become a breeding ground for bacteria.
3. Scrub Every Part Thoroughly
Use your bottle brush to scrub the inside of the bottle, paying special attention to the bottom and the sides. Use the nipple brush to clean the nipple thoroughly, squeezing the brush to get into all the small holes. This step is critical for removing any trace of milk residue. Ensure all parts, including the threads of the ring, are scrubbed clean.
4. Rinse with Hot Water
Rinse each part under running hot water to remove all soap residue. It’s important to use hot water, as it helps to rinse away the soap more effectively than cold water. Check carefully to ensure there are no soapy bubbles or milk film left on the items.
5. Sterilize and Air-Dry
After washing, you can sterilize the bottles. For newborn babies, it is recommended to sterilize daily. You can do this by boiling the parts in water for 5 minutes, using a microwave steam sterilizer, or an electric sterilizer. Once sterilized, place the parts on a clean, dedicated drying rack and allow them to air-dry completely before reassembling and storing. Never use a towel to dry the inside of a bottle, as this can introduce bacteria.
When and How to Sterilize
Sterilizing is the ultimate defense against harmful bacteria. While regular washing and sanitizing are sufficient for healthy older babies, newborns (especially those under 3 months), premature babies, and babies with compromised immune systems benefit greatly from daily sterilization.
You should also sterilize all new bottles and teats before their first use. After the newborn phase, sterilizing once a week is a good practice to maintain hygiene. There are several methods to sterilize your baby's feeding equipment:
- Boiling: A simple and effective method. Submerge all parts in a large pot of boiling water for 5 minutes. Ensure they don't touch the sides of the pot.
- Electric Steam Sterilizer: These units are very convenient and fast, often taking just 8-10 minutes. They are also designed to keep the bottles sterile for a number of hours.
- Microwave Steam Sterilizer: Similar to electric steamers, these are compact and easy to use. Just add water and put it in the microwave for a few minutes.
- Cold Water Sterilizing: This method uses a specialized sterilizing solution or tablets dissolved in cold water. The items are submerged for about 30 minutes. It's a great option for travel.
Regardless of the method you choose, ensure the parts are completely dry before storing them to prevent the growth of mold and mildew. Following this guide will help you understand the best practices for cleaning bottles for newborn use, ensuring your baby is fed from the safest possible equipment.